| |
|
|
|
|
|
|
| |
|
Tutorial
: making the Lotus Elise Mk1
|
|||||
You will see that in this tutorial I used edit mesh for most of the time, but if you have 3dsmax 5 or 3dsmax 4 with mesh tools, I suggest that you use editable poly since it has some features that makes your modeling a lot easier (like selecting entire edge loops). Also insted of using slice modifier you can use quick slice or just "cut" from editable poly. |
|||||
|
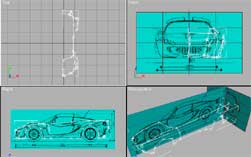
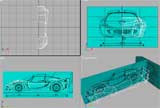
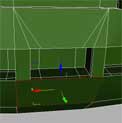
First of all I had to find some Lotus Elise blueprints... but although I search hard all the web I didn't find them. I only found the Lotus Elise mk2 blueprints and I studied them carefully and found they are somehow similar in shape as the lotus Elise 1. So my idea was tot make a primary mesh of the car after this blueprints and them modify the mesh after the images of Lotus Elise 1 ( I downloaded I think 30-40 of images of Elise 1 in all positions) Of course the blueprints were white with black lines. So I had to modify them in photoshop by replacing the white with a light blue ( I didn't want the blueprints to interfere with the object (white when selected). After that I created 2 boxes as the same ratio as the blueprints and placed the bitmap on them. Then I started to create lines in the Right view corresponding to the shape of the car. Then I moved the vertices in the Front view and Perspective corresponding to the blueprints. I didn't try to make the lines bezier or smooth, I only worked with corners (not like in my first car tutorial) because my goal is to create a low poly mesh and then edit it with mesh edit and mesh smooth.
|
|||||
|
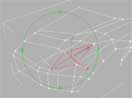
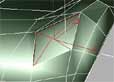
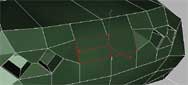
Notice what configuration I made for the headlight:
I didn't wanted the spline network to be very complicated but only to have the major lines of the car. The rest well done with edit mesh. Make sure you have splines to that are making surfaces of 3 or 4 splines. We do that, because will use the Surface modifier that will create a patch where it finds 3 or 4 splines intersecting each other. So, I applied a surface modifier with 0 steps and then a Edit mesh modifier : |
|||||
|
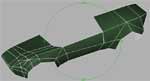
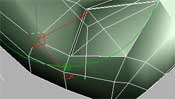
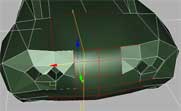
Now
you can forget about splines and surface, from now on I only used
edit mesh.
I also created 2 additional faces (with 3 sides) after I extruded the edges.(E.g.. in the picture above the last face from the right is created, the left one isn't created yet) The same way I worked with the others outer edges of the car :
|
|||||
|
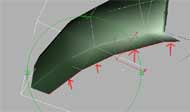
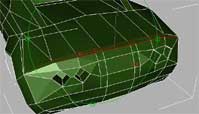
This is how I made the air wing (hmm sorry I don't know how to call it :)
You probably notice that I already started to work with a true picture of the Elise 1 and trying to correct the differences between the mesh I made after the blueprints and the images of the Elise 1. Next I created a mirror reference copy of the object.
|
|||||
|
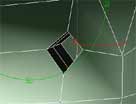
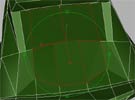
The
headlights: I selected the faces from the headlights and I scaled them:
With the four faces selected I extruded them inside (-5) and then outside (+2):
|
|||||
|
Next I selected the edge near the headlights and chamfer them (the faces will result will be the smaller headlight):
I extrude the faces inside, twice :
Next , I deleted the reference I made earlier (after tweaking the mesh and when I was sure the proportions were correct). Then I created a mirror copy (not reference) and I attached the new object to the older one (in edit mesh). Then I selected the central edges and I welded them:
|
|||||
|
The
backlights: Now
it was time to work at the back. I didn't created the back lights
with the half of the mesh, because I didn't saw correctly the influence
of the changes I made to the mesh. Now with all the mesh, I was
able to make changes, to apply mesh smooth and see how it looks.
Then It came the second pair of headlights (see in the pictures how I deleted some face then created them again with different diagonal):
|
|||||
|
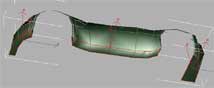
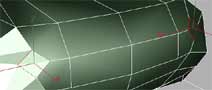
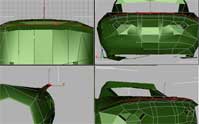
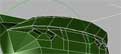
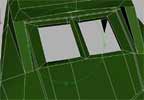
I sliced the middle faces between the backlights to create some room for the registration number:
After that I started to work with the tail wing, I sliced some faces, then I selected some thin faces from the back:
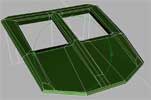
Next I extruded the faces twice:
This is how the tail looked:
|
|||||
|
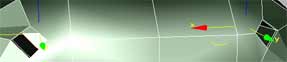
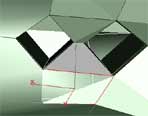
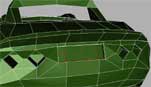
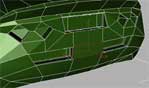
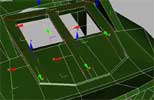
In the next 3 images you'll se how I made the back holes (with slice, extrude). You notice that I applied the slice modifier several times to cut some faces.I also deleted some polygons and then recreated them with the different diagonal. After one step I always previewed with mesh smooth to see if everything was OK:
|
|||||
|
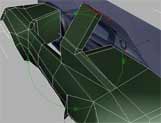
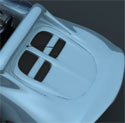
Next:
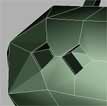
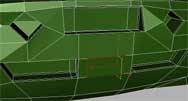
the trunk (boot) Same way I sliced the faces to make some room for the holes, then at first I wanted to separate this part of the mesh from the rest of the car but finally I decided it was best to make everything in one mesh (in the end I hidden the rest of the car to have better control of the faces I was working on):
|
|||||
|
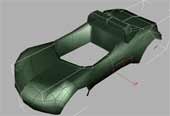
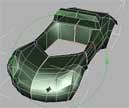
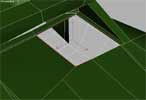
And finally I sliced twice the middle part and then I selected the faces and extruded them:
After that I welded the vertices of the extruded faces.
|